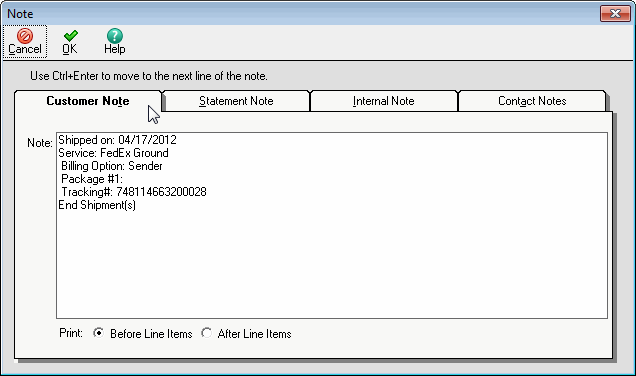
ShipGear’s default interface is set up to automatically write freight back to the Freight Amount field when you ship against Sales Orders and Invoices. ShipGear updates the Freight Amount field with the current freight for all shipments against an order. Freight Amount is calculated as: Total Shipper's Cost + Handling Fee (if applicable).
Note : For all document types, updated shipment information is available through your carrier software history and/or the Dashboard module.
To change how and when freight write-back occurs, edit the default write-back settings as shown below.

This example shows freight write-back to UPS WorldShip.
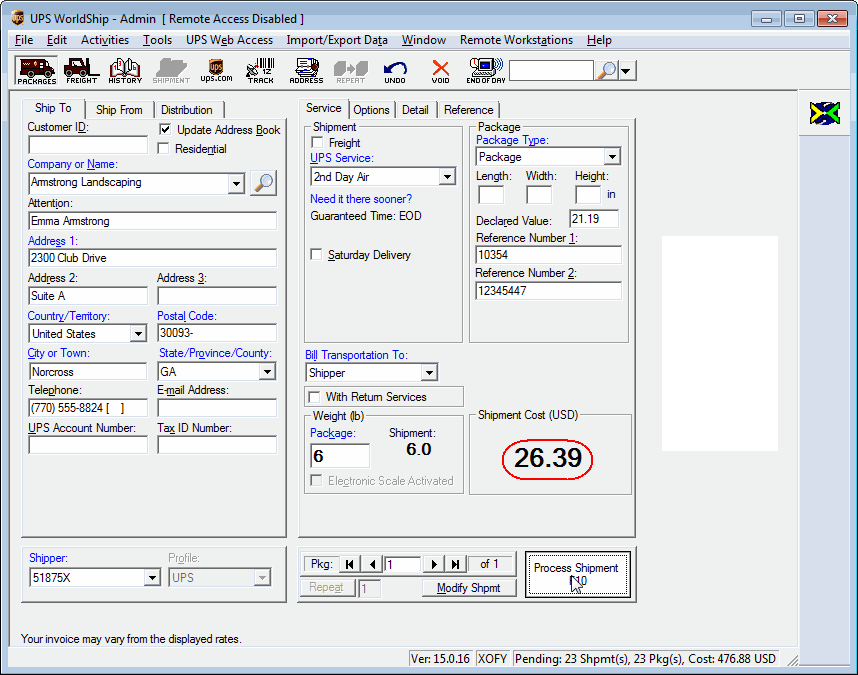
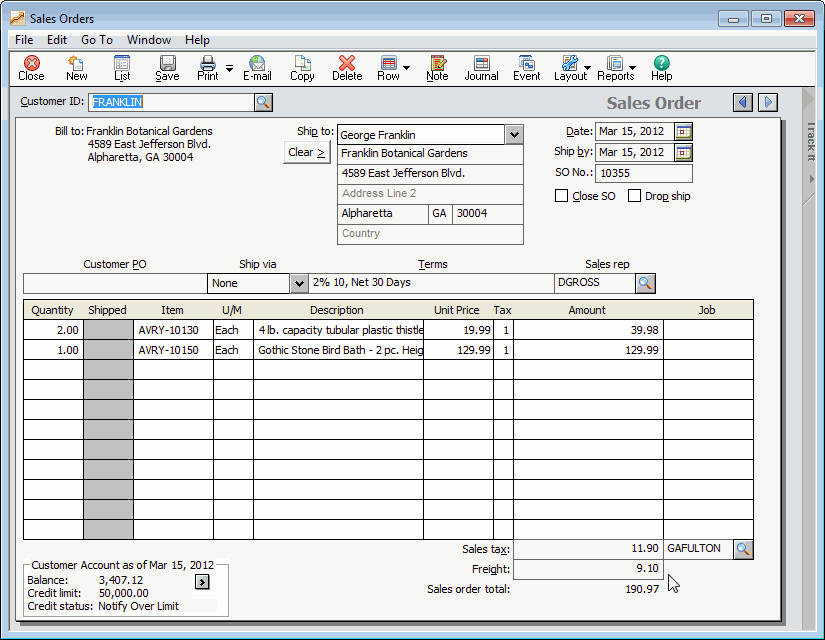
This screen shows freight write-back to a Sage 50 Sales Order.
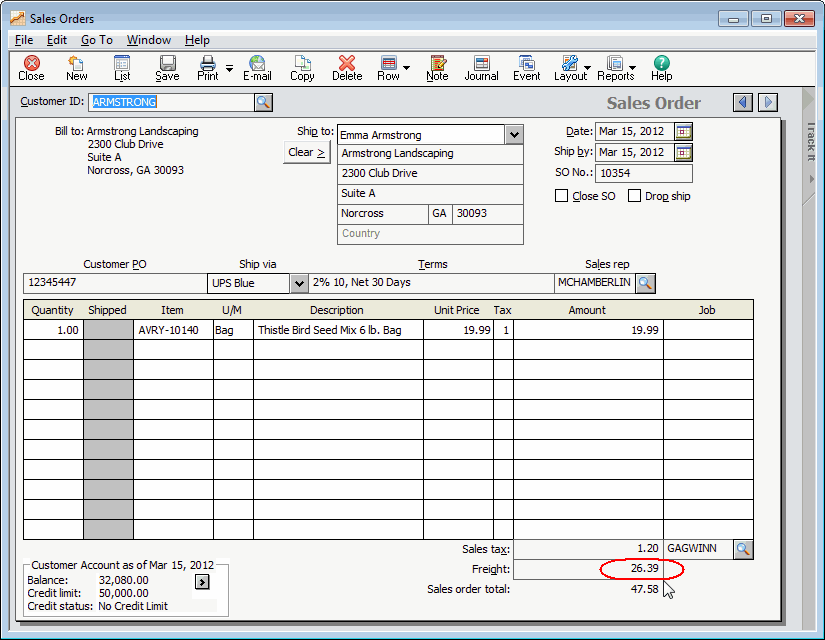
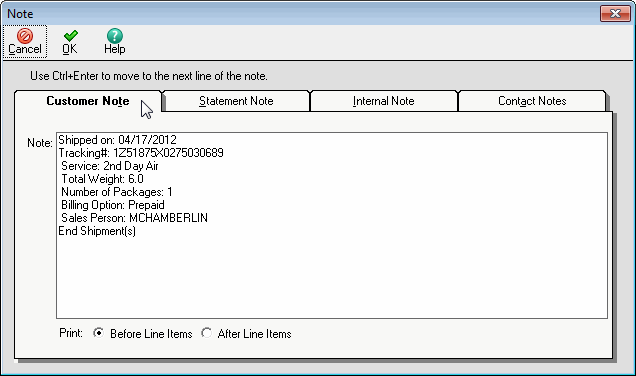
In ShipGear, tracking information is written back to Sage 50 by default, and you can customize the carrier fields that are written back to Sales Orders or Invoices.
Note : ShipGear will not overwrite existing tracking information; instead, a new line with the current date's tracking information is appended to the existing info.
In Customize Interface, under Write-Back Setup, select the Tracking Information node. To disable write-back, uncheck the "Write the information below to Sales Orders/Invoices when a shipment is processed in Carrier" check box. Choose whether to write tracking information back to the Customer or Internal Note for Sales Orders or Invoices.
When updating the tracking information to the Customer Note in Sage 50, check the "Print Notes After Line Items" to print notes after line items. To print notes before line items, leave this box unchecked.
Modify the Tag or Carrier Field Name : The Tag is the printed title; the Carrier Field Name is the field value in the carrier system that will be written back to Sage 50 under its corresponding Tag. To change an existing entry, click inside the row and type, or make a selection from the drop-down list (if applicable). When you type in a Tag row, a pencil icon is activated to the left of it. A selected row will have a triangle next to it.
Add Tag/Field names : To add Tags, position the cursor in a blank field and begin typing. Then, select a Carrier Field Name from the drop-down list to be associated with the new Tag.
Delete a row : Hover over the rowbar until an arrow appears. Single-click with the mouse so that the row is highlighted. Then, press Delete or Enter on your keyboard.
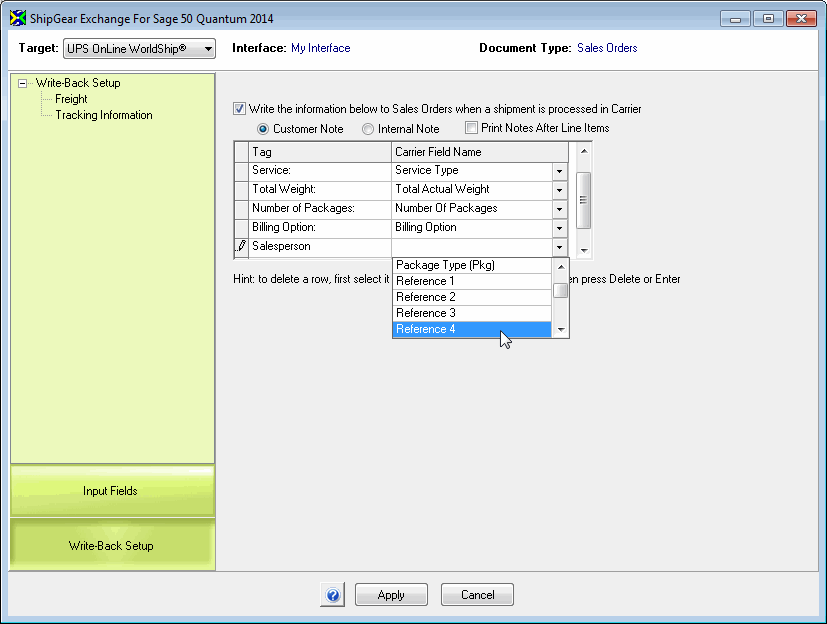
When you are done modifying or adding Tags and carrier system fields, click the Apply button.
Freight and Handling Charges
Handling Charges entered on the Options tab in WorldShip are written back to Sage 50. However, to further define and enhance default freight and handling charges, we recommend using the ShipGear Exchange Freight Rules add-on; it allows you to create custom freight rules to control write-back.
After processing a shipment with write-back enabled, you will see the Freight and Tracking Information written back to Sage 50.
Freight :

Tracking Information :
Freight and Handling Charges
Handling Charges are applied on a per package basis. See Handling Charges for more information about how to set up and use handling charges in FedEx Ship Manager.
To further define and enhance default freight and handling charges, we recommend using the ShipGear Exchange Freight Rules add-on; it allows you to create custom freight rules to control write-back.
After processing a shipment with write-back enabled, you will see the Freight and Tracking Information written back to Sage 50.
Freight :
Tracking Information :
