When you select ShipGear eNotify in the Customize Interface window, you'll see the three email template types discussed in the Email Templates Overview. In this section, we'll use the "New" template as an example. Click on it to display the Email Template Editor.
Note: You can only customize or create new email templates if you are using ShipGear eNotify Premium.
Edit a default template or create a new one
When you click on the New, Edited, or Voided Template links, the default template for that selection opens in the Template Editor.
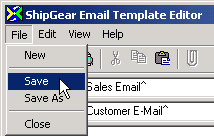
If you want to edit the default template, make your changes based on the instructions in this section. Performing a File > Save when you're finished with your changes will overwrite the default template. Performing a File > Save As will prompt you for a new file name and preserve the original default template.
When you want to create a new template, select File > New. A blank template opens in the Template Editor. Using the information in this section, create the new template according your needs. When you are done, select File > Save and enter a new filename. This will now be the default template for the template style you selected (New, Edited, Voided).
What does the ^ symbol signify?
Before we begin, you'll notice that many words or groups of words throughout the default template have a caret ( ^ ) symbol before and after them. These caret symbols indicate a field from the financial system or carrier system whose shipment data will be imported when the email is sent. To make the fields easier to identify, the financial system fields are additionally marked by the following symbol: (f). You can make changes or add to these fields later.
The Editor
The Editor looks like a regular email window but it has some special features. Each section allows you to build and customize the email template with fields you choose from your financial system or the carrier system.
Customizing your email templates also allows you to integrate the email output visually with your company's website or marketing material and deliver a cohesive, professional-looking email. Customize your template by changing the colors, text, fonts, borders, inserting your company's logo, and more.
This section explains how to set up the heading fields in the email template. These fields mostly appear outside of the email body.
From:The From line is the Sender of the email.
To add the From: field
Click the "From:" button to import the sender address directly from a field in your financial system.
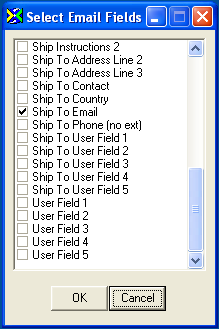
A pop-up window allows you to select from a list of Email fields. Click the check box next to the field you want to import.
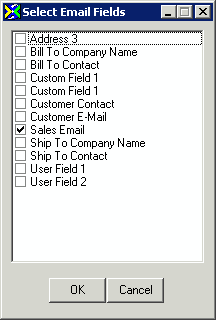
When you click OK, the field name you selected appears in the From field.
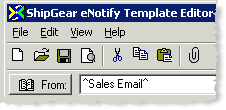
You can also type an email address directly into the field.
To:This is where you want to import the email
address of the contact to whom you wish to send a message.
To add the To: field
The default is the ^Email^ field, which is imported from the financial system or carrier system. You can change the field that is imported by clicking the address book and selecting a new field from the pop-up box. (See From: description above)
CC:The CC field allows you to send a courtesy
copy of the message to someone else besides the addressee in the To field.
To add the CC:field
You can select a field from the financial system by
following the method described above in the "From" section.
Subject:This is where you create the topic of
the message.
To create a Subject
You can use a combination of text and imported financial system and carrier system fields to construct the message subject.
Click the Subject heading...
... and select either a carrier system field or financial system field:
You can add multiple fields by positioning your cursor in the Subject
field and repeating this process where you would like the additional fields
to appear. Here is a simple example:
This composition will insert data from the field "Reference 1" after the "Shipment Notification: shipment for" text. When a New email is generated, the Subject will look like this:
You can also type text directly into the field.
Logo:This field allows you to specify a company
logo to be used in the email. The following file formats are accepted
for logos: JPG, ICO,
BMP.
To add a logo
Click the Logo button.
Navigate to the folder where your logo is located
and select it.
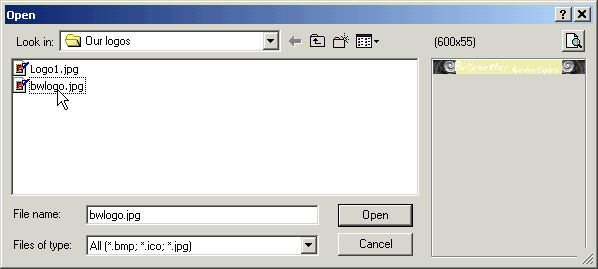
Notice that you can check the size of the logo
above the Preview section. You can also preview the logo in a separate
window by clicking the Preview button.
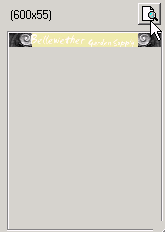
Preview window:
When you are finished, click Open.
The file is copied to the ShipGear folder.
The Set Position button allows you to place a
logo image outside of the email body's border. Click
the Set Position button and select "Place logo at top of email"
to enable the options. Then, select Left, Right, or Center to place the
logo. Click OK when you are finished.
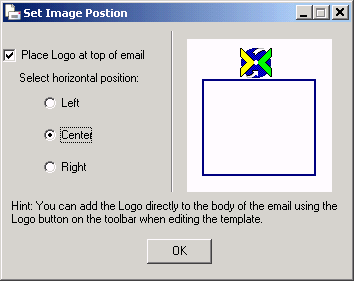
You can add a web link to your logo in the Logo
Web Link field. Type the address into the field in the following format:
http://www.yourcompany.com.
Note: You will see the logo when you preview the email template.
Carrier System and Financial System Fields
ShipGear comes with a default template, but you can customize your email template by adding fields that will import data from the carrier system and your financial system documents.
Position the cursor in the body of the email where you want to insert the carrier system field.
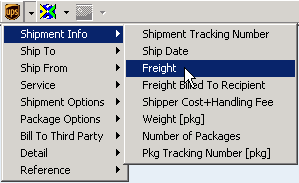
Above the email body, you'll see Insert: and the carrier logo. Click the arrow next to the carrier logo.
From the menus, select the fields that you want to use.
The field is inserted into the email template. Repeat these steps to insert more carrier system fields.
Note: You cannot enter any text after a package field. If any text if found, the field will be highlighted and you'll see the following warning and instructions when you try to save or preview the email:
To add financial system fields
Position the cursor in the body of the email where you want to insert the financial system field.
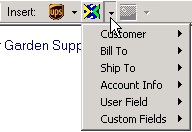
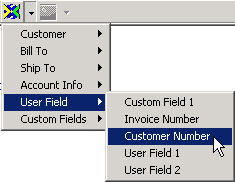
Above the email body, you'll see Insert: and your financial system logo. Click the arrow next to the logo.
From the menus, select the fields that you want to use.
The field is inserted into the email template. Repeat these steps to insert more financial system fields.
Note: You cannot enter any text after a package field. If any text if found, the field will be highlighted and you'll see the following warning and instructions when you try to save or preview the email:
You can change the appearance of your email using the following tools:
Font, Font size, Bold, Italics, Underline, Text Color
This information describes how to apply formatting to text in your email template. The Formatting toolbar give you quick access to format commands. The down arrow next to a button provides additional selections.
(Click image for field descriptions)
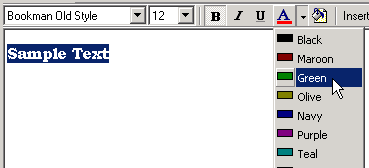
The text formatting toolbar allows you to highlight text in your email and then format it. For example, highlight your email text and select a font from the drop-down list to change the email font. While the text is still highlighted, choose a font size. Make it bold and change the color of the text.
Example:
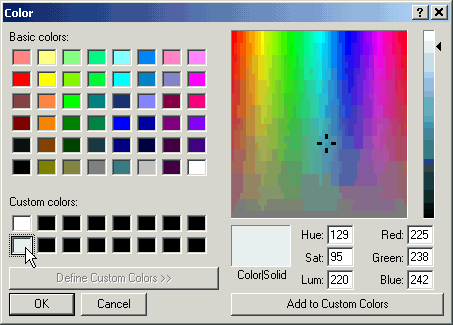
The Background button, located on the toolbar, allows you to quickly change the background color of the email. Press it to select a color (or create your own) from the pop-up dialog. Click OK.
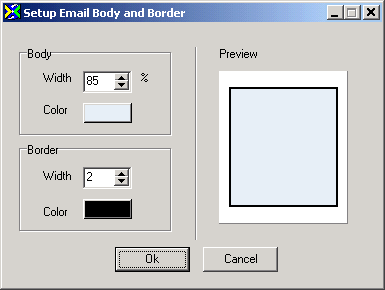
Borders can add color and emphasis to your email templates. The email border surrounds the email content. You can configure both the width of the email body and the border width. The email body width is a percentage, so the body will change size depending upon the size of the window it is viewed within.
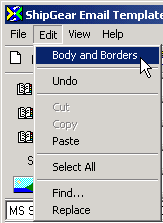
Select Body and Borders from the Edit menu.
In the Body section, configure the width of the email body by typing in a width percentage or by using the up/down arrows to select a percentage. You can also choose a background color for the body here.
Next, in the Border section, choose a border width. You can also remove the border by setting the width to 0.
View your changes in the Preview pane and click OK when you are done.
Email Body Logo
You can insert multiple instances of your logo within the email body. These logos will also be linked to the website you specified in the Logo Web Link field.
Click the arrow next to the logo button.
Select Left, Center, or Right to position the logo.
The logo field appears in your email template. You can repeat this process to insert additional logos.
You can attach one file to an email template.
Click the attachment button.
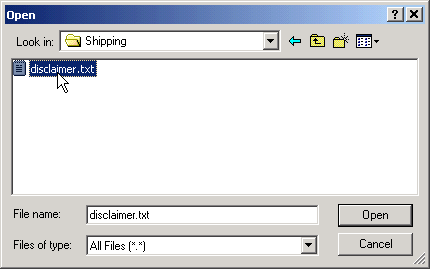
Navigate to the folder where the file you want to attach is located and select the file. Click Open.
An informational dialog appears to tell you that the file will be copied to Email folder in the ShipGear Data folder. Click OK.
The new path to the attachment displays in the Attachment field.
When you save or preview the email template, ShipGear checks to make sure that all of the field names you've used in your template are valid. If a field is invalid, it is highlighted in yellow:
You cannot save or preview the template until you have fixed the invalid references.
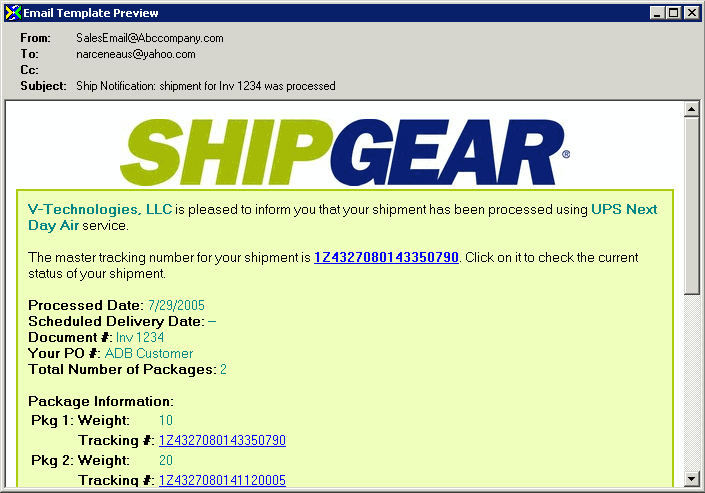
From the View menu, select to preview your email with or without financial system data.
If you choose to use data from your financial system, click on a record when prompted and press Select. You will see the layout of your emails with data from the fields in your financial system.
If you choose to preview the template without data, you will see the layout of your email with field names.
Screen shot Example With Financial System Data
When you are done previewing the template, close
the preview window and save the template.