ShipGear provides a default macro that allows you to write back to Invoices/Sales Receipts. You can customize the macro in order for the write-back to occur correctly to your document. You may want to customize the macro to match the fields in your most commonly used QuickBooks Invoice or Sales Receipt.
In the following sections, we’ll use Invoices in our examples.
First let’s look at your QuickBooks Invoice. ShipGear’s goal is to write the tracking number and freight amount to the Description and Amount columns of a "Delivery Charges" item line on your Invoice. The Item is most likely Delivery Charges but it can be whatever you want. Take note of where the Item, Description, and Amount fields are.
This graphic is an example from the QuickBooks sample Rock Castle Construction
company (Rock Castle Invoice). Note that the Item, Description and Amount
columns are first, second, and fifth, respectively:

Click on a blank line in the Item column. Type "D" and QuickBooks
types the rest. We’ll take advantage of that in our macro later.

Now go back to ShipGear Exchange. In the Edit Interface window, select Write-Back Setup from the selection of buttons on the left.
This section allows you to configure write-back, define the freight amount, and add and delete "building blocks" from the default macro.
Since you already selected the Macro method when you first ran ShipGear, we'll jump to the Macro Settings tab and start customizing our macro.
Macro Building Blocks represent a piece of information, such as text or an action. You put these pieces together in the Current Macro list to instruct how write-back is executed by the ShipGear macro. You can even test your macro when you’re done putting it together.
Basically, you want to make the macro drop the correct information into the right fields on your Invoice (or Sales Receipt, if that is the document you’re writing back to). That’s why we noted their location before. The next section describes general functions, followed by how to customize the macro for an Invoice form.
To add:
Select a building block from the left panel.
Click Add.
Using the Up and Down arrows, move the block to the appropriate location in the Current Macro panel.
To delete:
Select a field from the Current Macro list on the right.
Click Delete.
To test the macro:
Click Try It!
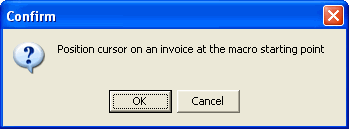
Position the cursor on your QuickBooks Invoice (or Sales Receipt) as directed by the dialog box.
Minimize QuickBooks.
Back in the ShipGear Exchange window, click the OK button on the Confirm dialog box.
Check to see that the Tracking Number and Freight wrote back to the correct columns. If not, make sure you have Tabs in the right places.
Customize the macro:
Use this example to test out your macro. This macro is for the sample Invoice shown above in the first section. Make sure you’re in the edit interface window with "Write Back to Invoices" selected. Remember, you can customize write-back to Sales Receipts (if applicable) in the same way; once you learn how to customize write-back to Invoices, you’ll feel comfortable doing Sales Receipts on your own.
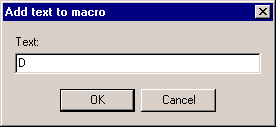
Click on "My Text" and click Add.
In the Add text to macro dialog box, type the
letter D and click OK.
The "D" will go into the Item field on your Invoice (and
once it's there, QuickBooks fills in "Delivery Charges"
for you, as we saw in the overview).

Highlight D in the current macro list and press the blue "up" arrow until D is at the top of the list.
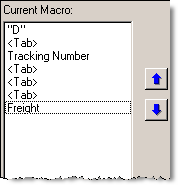
We need to add some tab spaces so that we can jump from the Item column to the Description column and then skip rows to get to the Amount column. Select <Tab> from the Macro Building Blocks and click Add three times.
Arrange the current macro list using the up and
down arrows so that it looks like this:

Note: Adjust the <Tabs> for your specific Invoice if you need
to.
The first tab gets us out of the Item column into the Description column,
where the Tracking Number is placed. The next three tabs jumps out
of the Description column, skips the Quantity and Rate columns, and
lands in the Amount column where the freight amount is placed.
Now let’s test out the macro. While you are still
on the Macro Write-Back Settings tab, click the Try
It button beside the Current Macro field.
![]()
Open a QuickBooks Invoice and position the cursor in the Item field.
Minimize QuickBooks.
Click OK on the Confirm dialog box.

The Tracking Number and Freight amount should appear on the Invoice
under Delivery Charges.

See also