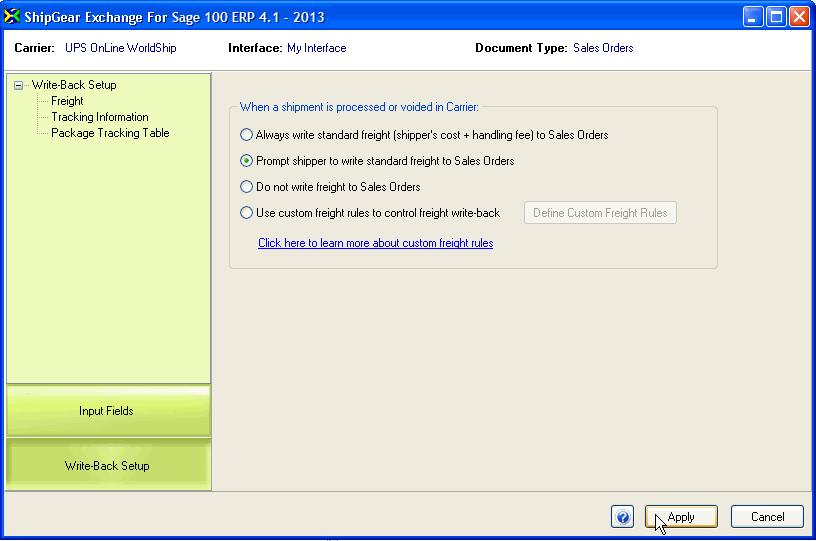
First, select the document (Sales Orders or Invoices) for which you want to modify write-back.
Click Write-Back Setup and then select the Freight node.
Make a selection from the 4 choices:
-
Automatically write standard freight to Sales Orders/Invoices: When you save or void a shipment in the carrier system, ShipGear writes the freight amount to your source document. This is the default setting.
-
Prompt shipper to write standard freight to Sales Orders/Invoices: When you save or void a shipment in the carrier system, the shipper receives a prompt asking if freight should be written back to the source document.
-
Do not write freight to Sales Orders/Invoices: Freight will not be written back.
-
Use custom freight rules to control freight write-back: If the Custom Freight Rules option is enabled in ShipGear, you can control how freight charges are written back to your Sales Orders/Invoices. You can use freight rules to modify the actual freight from the carrier system, or override that freight with a new amount. See the Freight Rules Help for more information.
Click the Apply button.