
ShipGear lets you customize the way data is translated between the ERP system, your carrier system(s), and ShipGear. Data is translated using field maps and value translations in Customize Interface.
1. Field Maps define fields that are mapped between the carrier system or ShipGear Input fields and your ERP or eCommerce system documents (orders, invoices, transactions, etc.).
ShipGear Input fields are like a reverse map from the ERP system to ShipGear, where you can choose fields from the ERP to write to the ShipGear database. That data can then be used in your eNotify email notifications, or viewed and exported in the ShipGear Dashboard.
2. Value Translations define how values from the mapped fields are translated between your ERP system and the carrier system or ShipGear; for example, 1ST SAT in the ERP system can be translated to mean FedEx Priority Overnight®.
3. Write-Back is how ShipGear writes freight and tracking information back to your ERP system source documents, including the use of custom rules to control how and when write-back occurs. You can set up write-back for each carrier independently.
This combination of field maps, value translations, and write-back settings defines the "Interface". ShipGear comes with a default interface (My Interface) that allows you to begin shipping immediately. You do not need to set up or customize an interface in order to ship.
However, if you would like more control over how data is automatically translated between the ERP system into the carrier system and ShipGear, the following sections show you how to customize or fine tune an Interface.
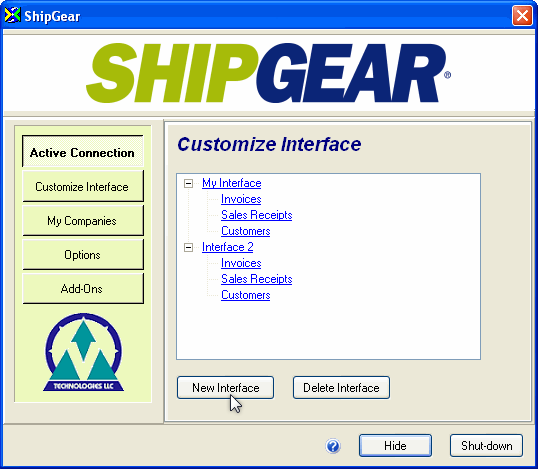
Open ShipGear Exchange and click the Customize Interface button.
To view or customize Field Mapping, Value Translations, and Write-Back settings, select a document from your Interface.
Field Mapping and Value Translations for UPS OnLine WorldShip®
Field Mapping and Value Translations for FedEx Ship Manager®
In the ShipGear Exchange window, click the Customize Interface button.
Click the New Interface button.
In the Create New Interface dialog box, type a name for the interface in the field provided.
In the Create From: field, select the existing interface on which you want to base the new interface. The list will include DEFAULT, My Interface, or any other interfaces you have created. The new interface will inherit any field mapping, Value Translations, and write-back setup characteristics of the interface you’ve chosen.
Click Next and select the companies that will use this interface by enabling the check box next to each company’s name.
Click Finish.
If you would like to enable ShipGear eNotify, FedEx ShipAlert, or UPS Quantum View for this new interface, complete the Wizard.
In the ShipGear Exchange window, click the Customize Interface button.
Select the interface name from the list.
Click Delete Interface.
Click Yes when prompted to confirm the deletion.
In the ShipGear Exchange > Customize Interface window, select the Interface name by clicking on it.
Click the Interface name once more.
Type the new name.
Press the Tab key.