FedEx Write-Back
ShipGear supports writing FedEx freight and shipment detail directly
to Invoices, Sales Orders, and Sales Receipts. When you run ShipGear for
the first time, you are prompted
to set up a write-back method. If you did not set up write-back at
that time or you want to change the way write-back is configured, you
can access Write-Back Setup in ShipGear Exchange. Here is a recap of the
write-back methods, and how to set them up and use them.
Direct Write-Back
Enable direct write-back
Freight Amount
Direct Write-Back Settings
The Macro Method
Access Write-Back
Enable the Macro option
Write to an
Invoice or Sales Order/Receipt While Shipping
Direct Write-Back
ShipGear can write freight and shipment detail back to QuickBooks automatically
or prompt the shipper for approval before write-back occurs. ShipGear
writes the information back to the Item Type and Item Code you select.
Enable direct write-back
In the ShipGear Exchange window,
click the Customize Interface button.
Click the document (Invoices, Sales
Receipts, or Sales Orders) link.
In the Carrier field, select FedEx
Ship Manager®.

At the bottom left corner of the
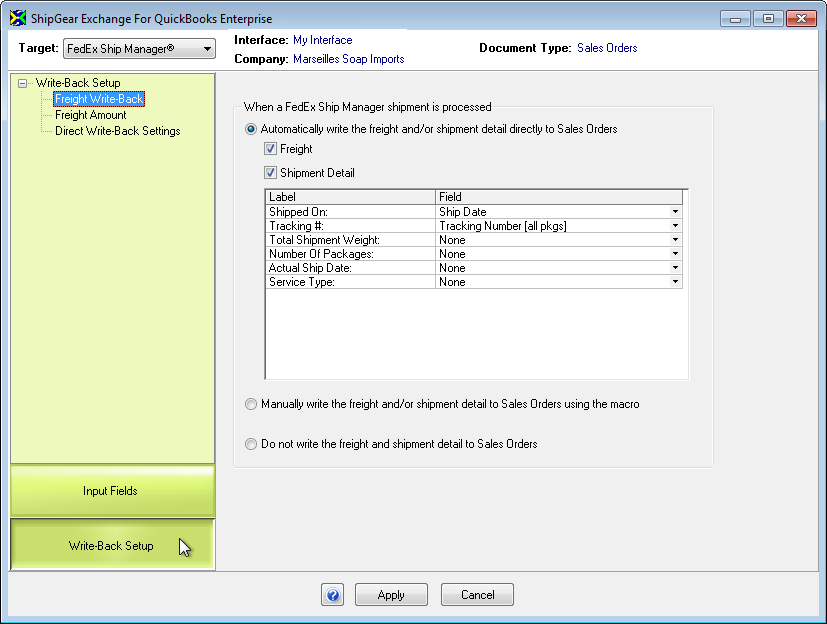
window, select Write-Back Setup. Under Freight Write-Back, select
the option to automatically write the freight and shipment details.
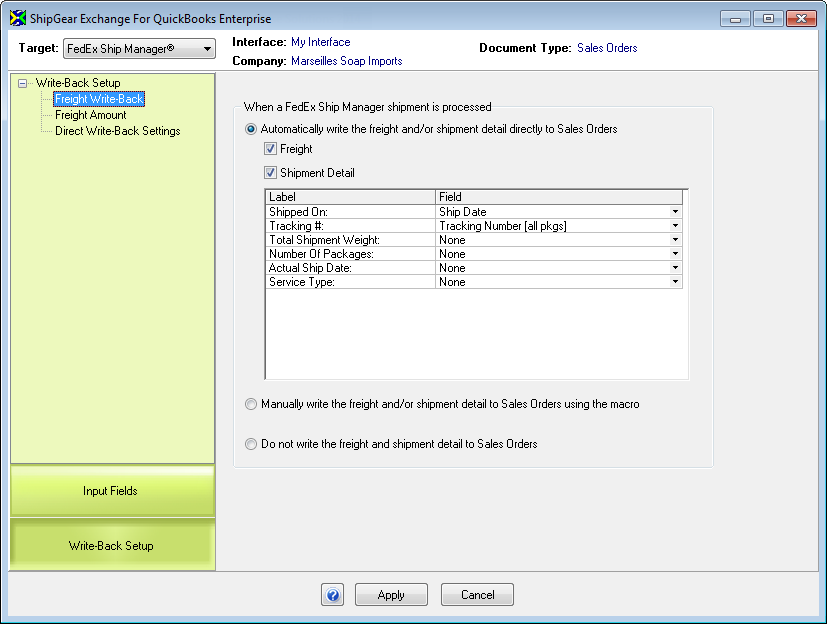
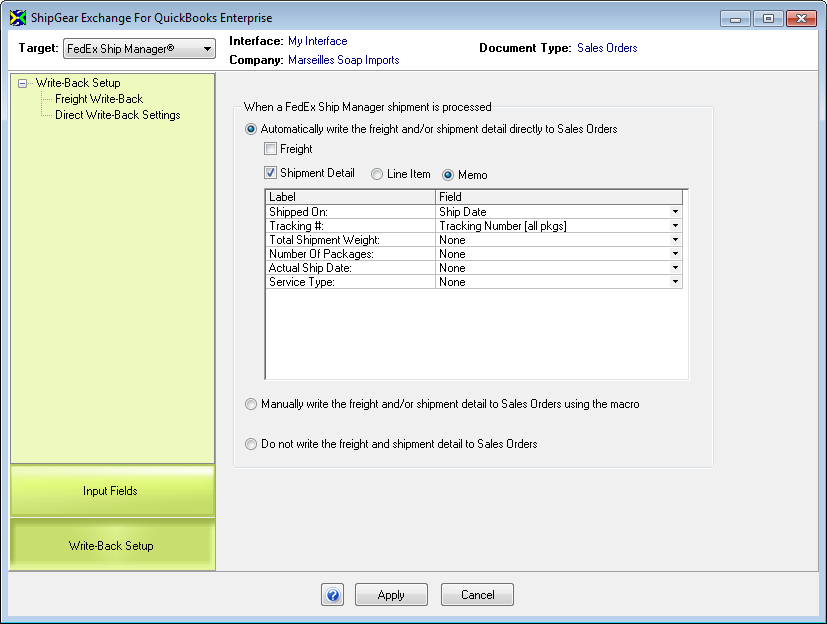
For Shipment Detail, you can select
to write back to the Line item or Memo field. To modify an existing
entry in the shipment detail, click inside the row and type, or make
a selection from the drop-down list. Select None if you do not want
the information to write back.
Freight Amount
ShipGear also allows you to configure how the freight amount is written
back to QuickBooks.
Select Freight Amount.
Make one of the following choices:
Freight Amount is shipper’s cost
+ handling fee: ShipGear writes the freight amount as the
Standard freight (shipper’s cost + handling fee) when you save or
void a shipment in the carrier system.
Use custom freight rules to control
freight write-back: If the Custom Freight Rules option
is enabled in ShipGear, you can control how freight charges are written
back to Invoices, Sales Receipts and Sales Orders. You can use freight
rules to modify the actual freight from the carrier system, or override
that freight with a new amount.
If you selected to use custom freight rules,
click the Define
Custom Freight Rules button to create freight rules. See the links
below for more information about custom freight rules.
Be sure to click Apply when you are done with
Write-Back setup.

Direct Write-Back Settings
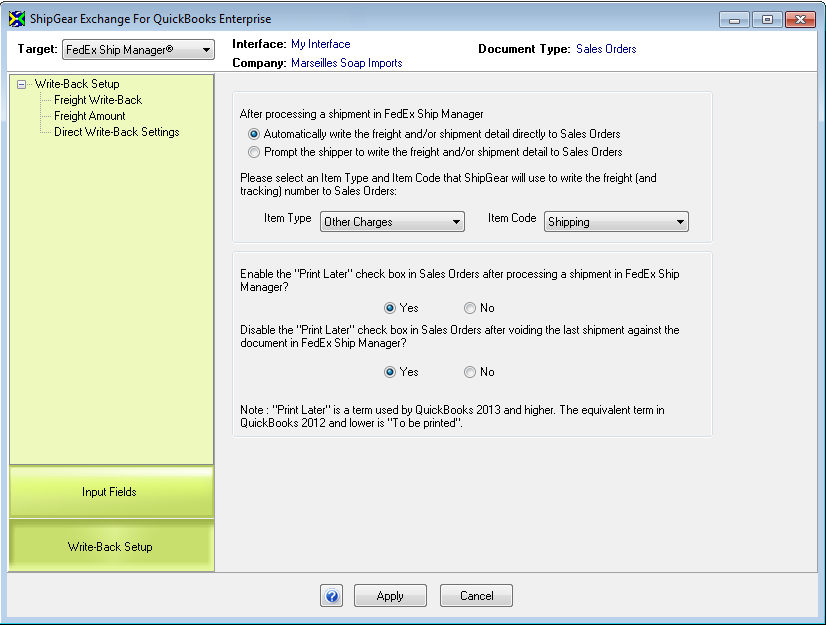
To use direct write-back, you must first enable the "Automatically
write the freight and shipment detail" setting under Freight
Write-back. Then, configure direct write-back settings.
Decide how
to write the freight and/or shipment detail to Invoices. You
can select "Automatically write the freight and/or shipment detail
directly to Invoices", which means that write-back occurs without
any user involvement. Or, you can select "Prompt the shipper
to write the freight and/or shipment detail to Invoices", which
means that before write-back occurs, a dialog will appear asking for
the user's approval.
Configure three items about write-back
to suit your needs.
Select the Item Type and Item Code that ShipGear
will use to write to Invoices. This setting allows you to drop
the correct information into the right fields on your QuickBooks
Invoice. You can accept the default settings, which are most likely
the fields to which you want to write back; or you can set these
items to the fields of your choice by selecting from the drop-down
lists.
Enable the "To be printed" check box
in Invoices after processing a shipment in UPS WorldShip (or FedEx
Ship Manager®) : When you choose Yes, the "Print Later"
check box will be checked, allowing the form to be printed later.
Disable the "To be printed" check box
in Invoices after voiding the last shipment against the document
: If set to Yes, when you void the final shipment of a document,
this setting will deselect the "Print Later" check box
automatically. Note : The term "Print Later" is used
by QuickBooks 2013 and higher. For users of QuickBooks 2012 and
lower, the term is "To be printed".
The Macro Method
ShipGear’s default interface defines a macro used to write freight and
tracking information back to QuickBooks when you ship against Invoices/Sales
Receipts. You may have to customize the macro in order for the write-back
to occur correctly on your Invoice.
Access Write-Back
In ShipGear Exchange, click the Customize Interface button and select
a document.
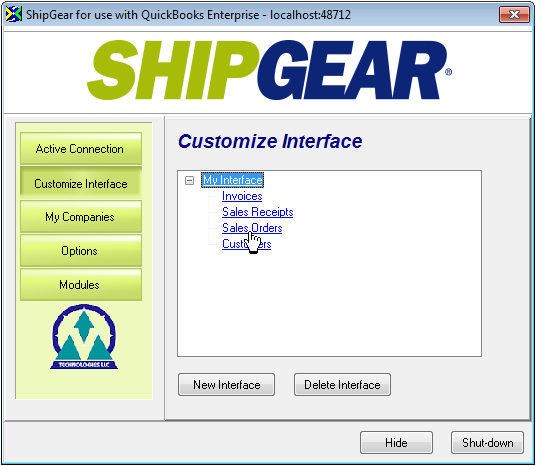
At the bottom left corner of
the window, click Write-Back Setup.
Enable the Macro option
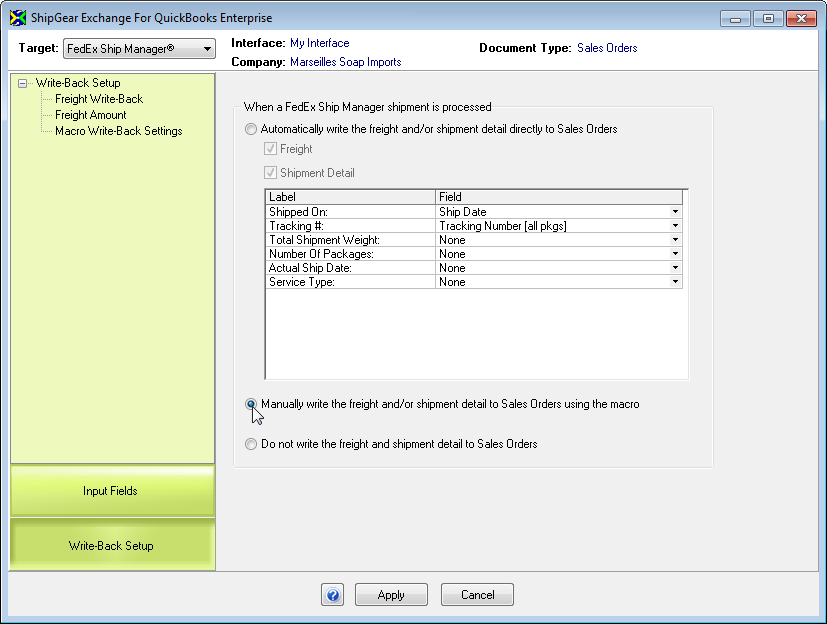
Under Freight Write-Back, select the option to manually write the freight
and tracking number to Invoices using the macro.
Write to an
Invoice or Sales Order/Receipt While Shipping
After processing a shipment :
Switch to QuickBooks and open the
Invoice or Sales Order/Receipt.
Position the cursor in the Item
column (for Invoices).
Click the "clipboard"
icon in your system tray.

The tracking number will write back as the Description and the Freight
as Amount (for Invoices).

(You may need to scroll to the right in this window to see the Amount.)
See also:
Customizing
the Write-Back Macro: Setup and Examples


